This article is a guide to printing in Kubuntu, a variant of Linux. We will discuss how to set up a printer, how to print a document, and how to diagnose common issues with printers. This article will cover the general tasks of printing without considering the details of specific printer models. We will assume that you have documentation with your printer that will explain how to connect it. Where this guide is not useful, you should consult the manual for your printer.
There are many different types of printers. Two main distinctions relevant to our purposes are the means of connection and the type of printing. For connections, we have two options: direct connection or a network connection. A direct connection usually uses a USB cable to directly connect your printer to your computer. This is by far the easiest method to set up. In contrast, a network printer connects to your local network, whether wired or wifi, to connect to your printer. The advantage here is that it allows multiple computers to connect to the same printer, sharing resources. In order to use a network printer, the printer and your computer need to be on the same network. Once the computer and the printer are on the same network, if it's a network printer, or once the computer and the printer are connected by USB, Linux should be able to find the printer very quickly.
A note about printer compatibility in Linux
Historically, printer support in Linux has been hit-and-miss. While this has improved considerably in the last decade, and it is likely that most brand-name printers you will find will work out of the box with Linux, we advise you to do your research on compatibility before purchasing a printer. You need to make sure that the specific model of printer you are looking at will work with Linux. (The part of the operating system that handles printers and other hardware devices is called the Linux kernel, and it is the same in every version of Linux. This means that you don’t need to specifically research if it works with Kubuntu; if it works for any Linux version, it will likely work with yours.) You can check this website from the Linux Foundation for a specific model of printer to see if it is compatible with Linux. If you type the model of your printer into the search box, it will show you the name of the driver; if you see a driver listed, it should work. Alternatively, you can perform a web search (e.g., Google) for the name of your printer and “Linux” and read some of the results that come up. For example, “HP LaserJet P1606dn Linux”.
Setting up a printer for first use
Make sure that the printer is turned on and connected to your computer, either directly by USB or through the network, depending on what type of printer you have. Once the physical connection is established, you can finish setting up your printer by going to the printer settings in Kubuntu. You can do this by pressing Alt+Space on your keyboard and typing in “printers” in the box that comes up at the top of your screen. You can also find it in system settings under the “Printers” section, found in the left column.
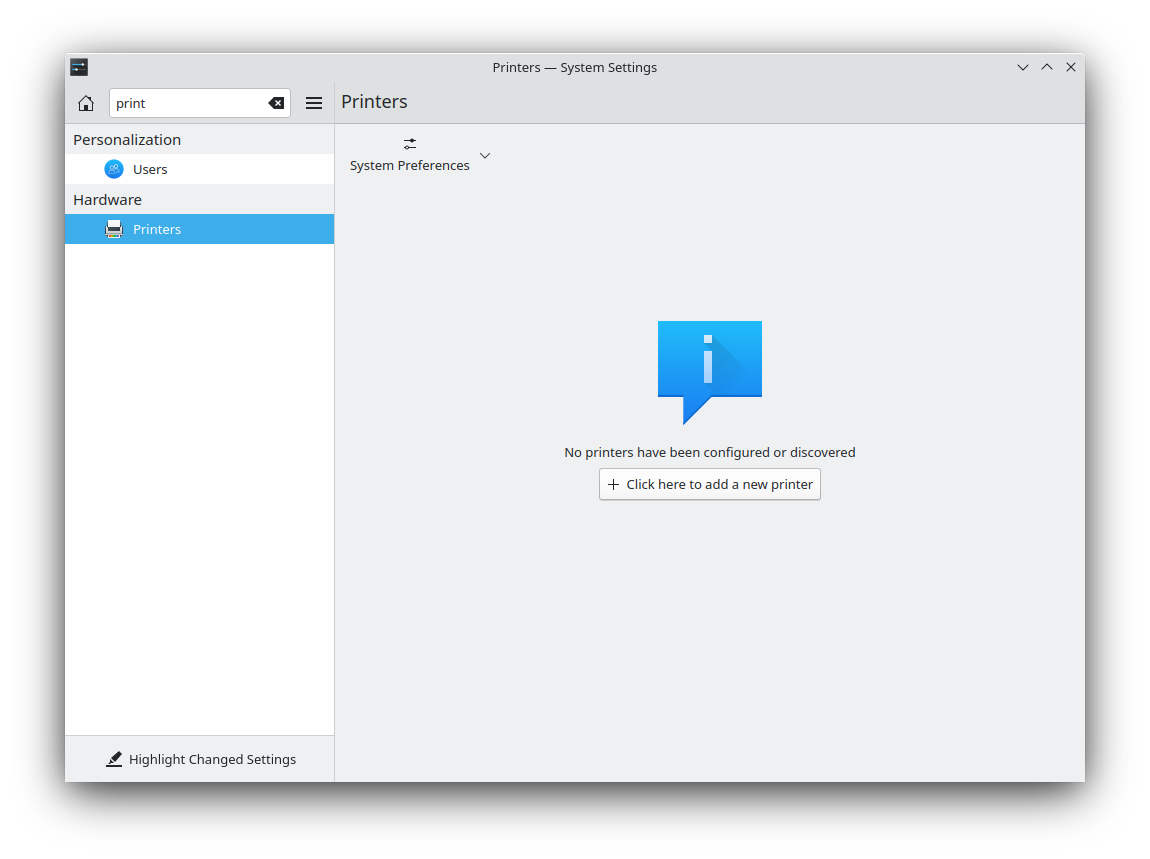
If you haven’t set up a printer before, then when you open the page all you should see is an alert that “No printers have been configured or discovered”, with a button beneath it that says “Click here to add a new printer”. You may also find that the printer has already been discovered and is listed as connected.
If not, then you should click the button to add a new printer. You will then be presented with a list of printer connections. Note that these are not necessarily printers, as you will likely conclude if you only have one printer. These are potential paths for connecting to a printer, places your computer can check to find a printer if one were there. But there is a good chance that your printer was already discovered by name. You will have to look through the list to see if one matches your printer manufacturer or model name. There is no standardized naming scheme for these printers, so you will have to read them carefully and experiment a little. Select one that looks right and click it to see if you can establish a connection. If not, try a different one. You should hopefully find one that connects to your printer eventually.
If you go through the whole list and still can’t find your printer, double-check that your printer is on and turn it on if not. You can also try turning it off and on again, as this can help with some printers. If none of these options work, it is possible that your printer is not compatible with Linux or there is some other problem.
Once you find a printer that connects, you should see something like this:
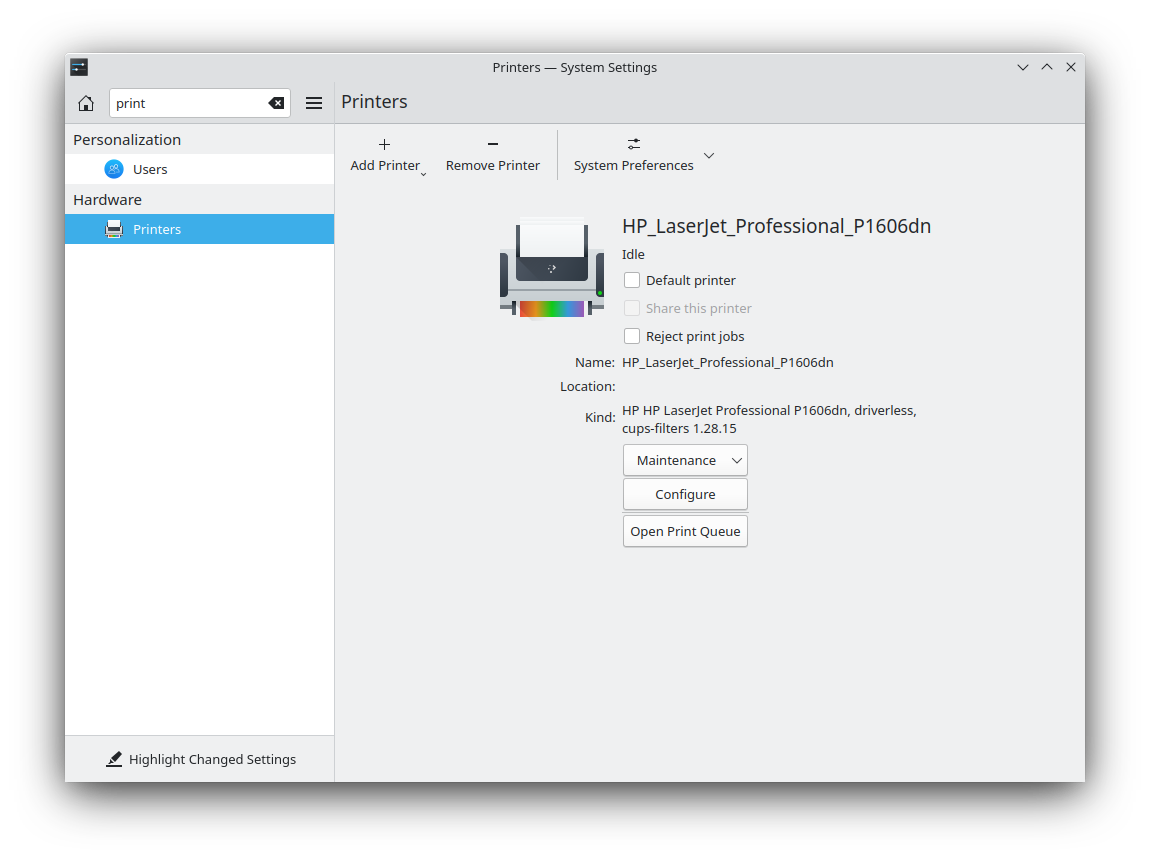
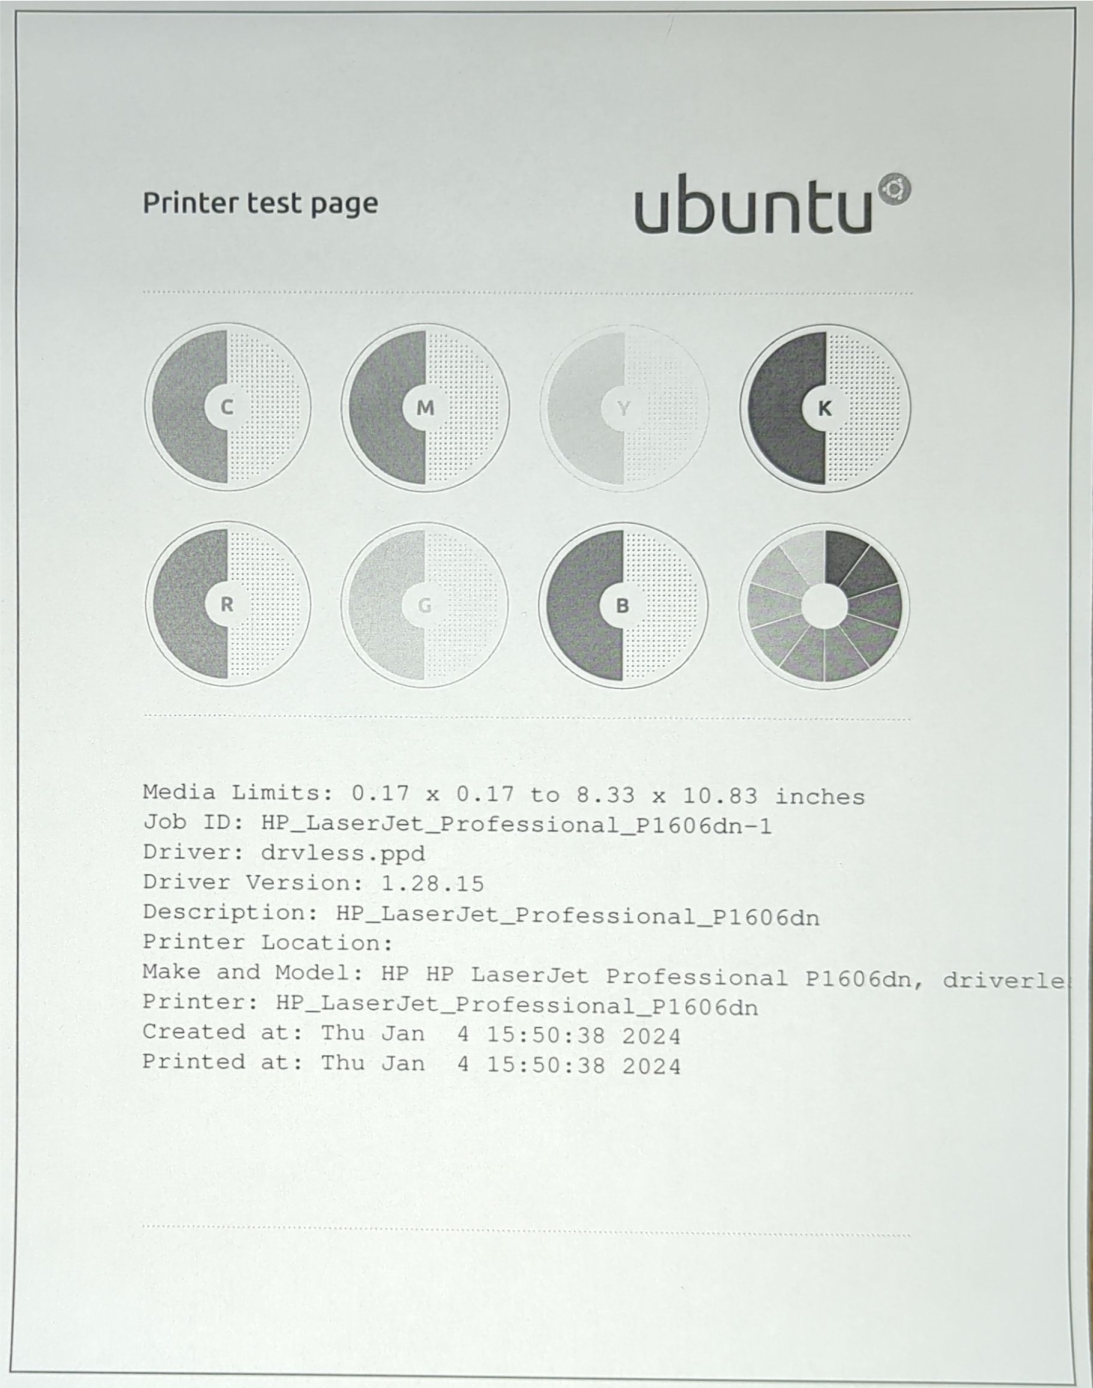
Now, you can check that your printer is configured correctly by printing a test page. Click on the button that says “Maintenance” and then on the option that comes up that says “Print Test Page”. If everything is working correctly, your printer should begin printing the test page within a few seconds. This is a basic diagnostic tool that allows you to check that your printer is working and see certain important information that can help diagnose problems.
Printing a document
Once your printer is set up, printing a document is usually simple, but it does depend on the application you are using. Most commonly, printing is done from one of three sources: a web page, a document file, or a PDF. In the vast majority of applications, the keyboard shortcut Ctrl+P opens a printing dialog window. There are also ways to print a document through the menu system of the application using the mouse. These are slightly different for every application, but they tend to follow similar design idioms and so learning one or two programs will help you to print from other applications you may encounter in the future.
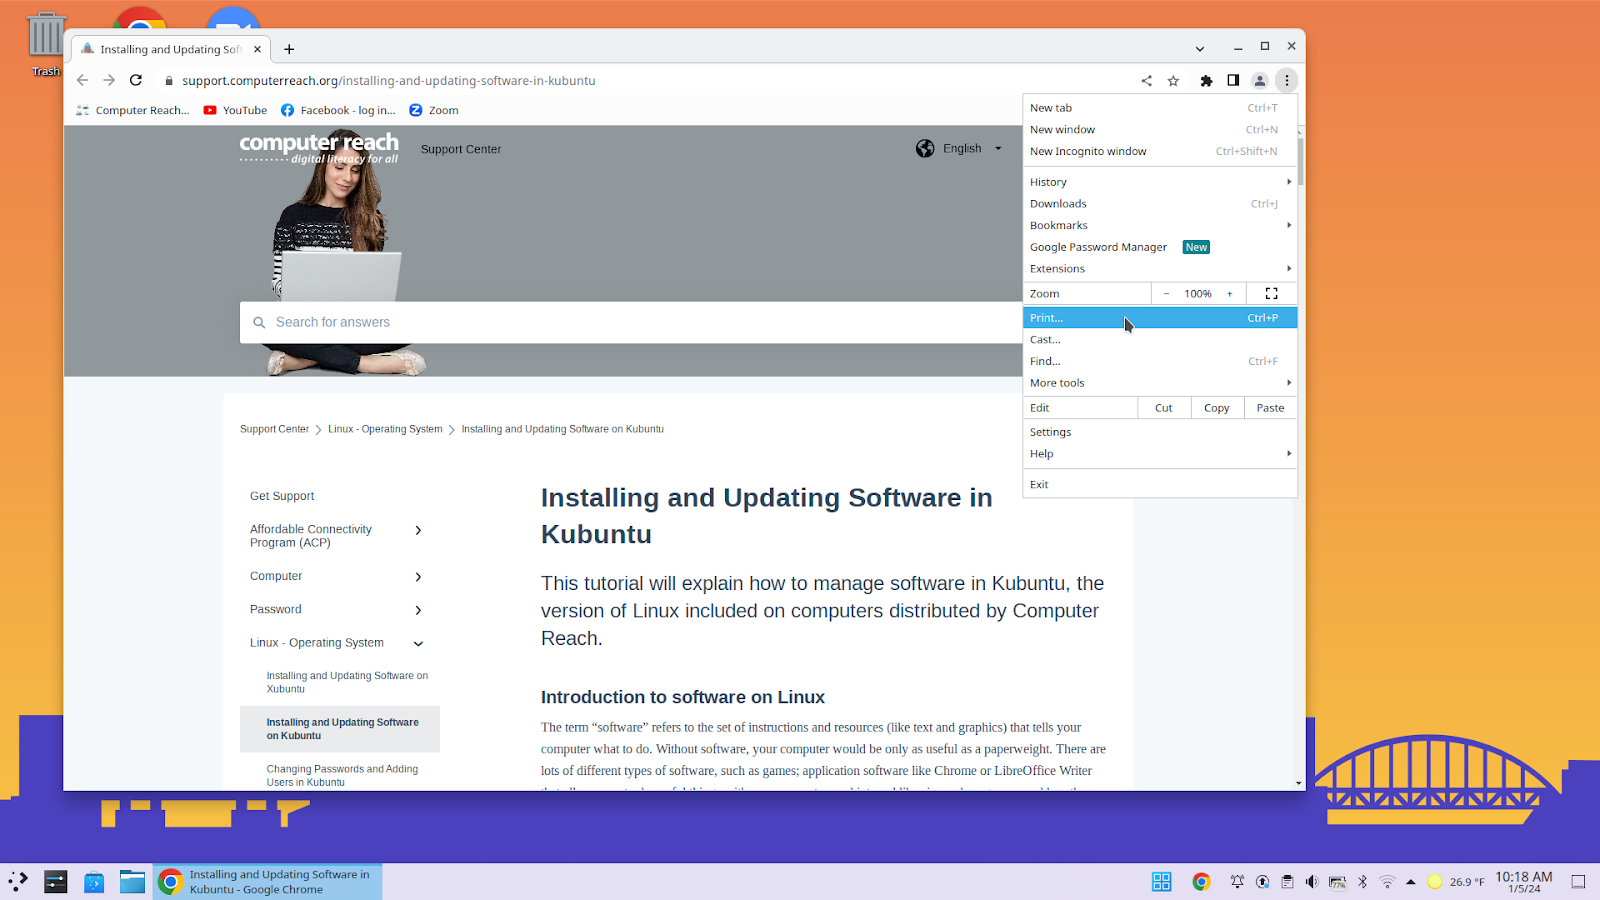
Within a web browser like Chrome, you can print any webpage you find by clicking on the three dots on the top right corner of the browser and finding the option labeled “Print” about halfway down the list.
If you click on the “Print” option, you will be prompted with a screen that looks something like this:
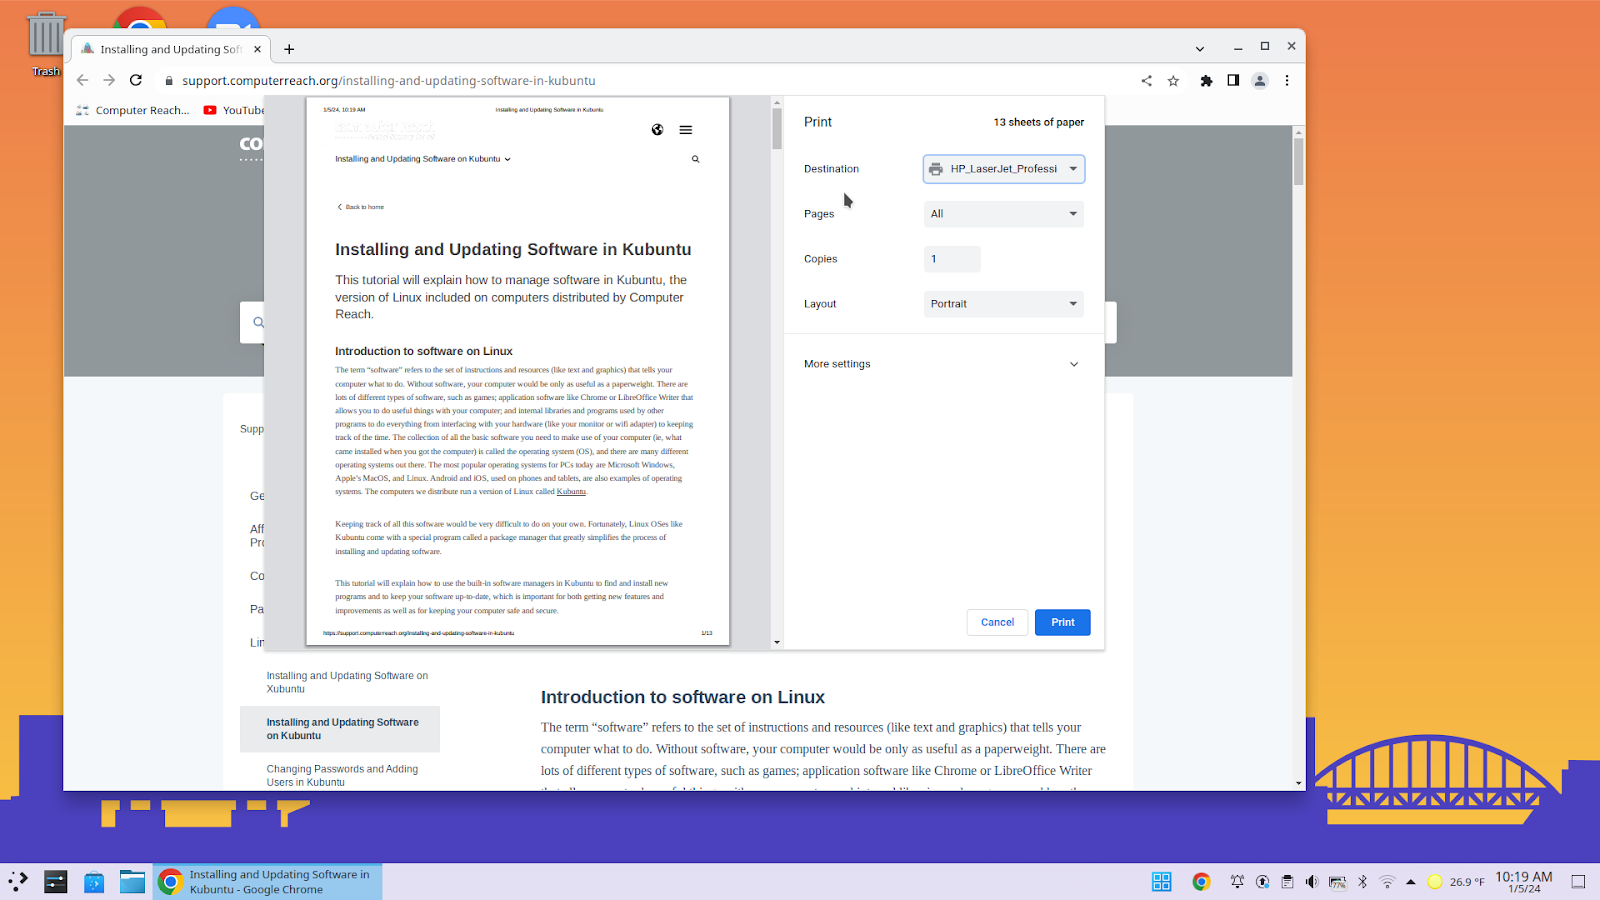
Make sure that you have the correct “Destination” selected. When you first start it, it may be set to “Print to PDF”, which will not result in anything being printed, but instead will generate a file you can send to people to be printed. (This can be useful if you need to have something professionally printed.)
On the left side of this window is what we call a “print preview”, which is a representation of what will show up on the page when you print it, which may not be identical with what is shown on your screen when you are reading it there. This is because the document is reformatted to suit the medium of print automatically.
On the right side are all of the settings that configure how the document will be printed. “Destination” of course refers to the printer you want to send the document to. “Pages” refers to which pages of the document you want to print. By default, it is set to “All”, which is usually what you want. However, if you only wanted to print, say, the second page, you could type “2” in the box that appears when you select “Custom”. The “Copies” field refers to the number of times you want the document to be printed. And finally “Layout” refers to the orientation of the document when printed—will it be portrait (i.e., tall) or landscape (i.e., wide)?
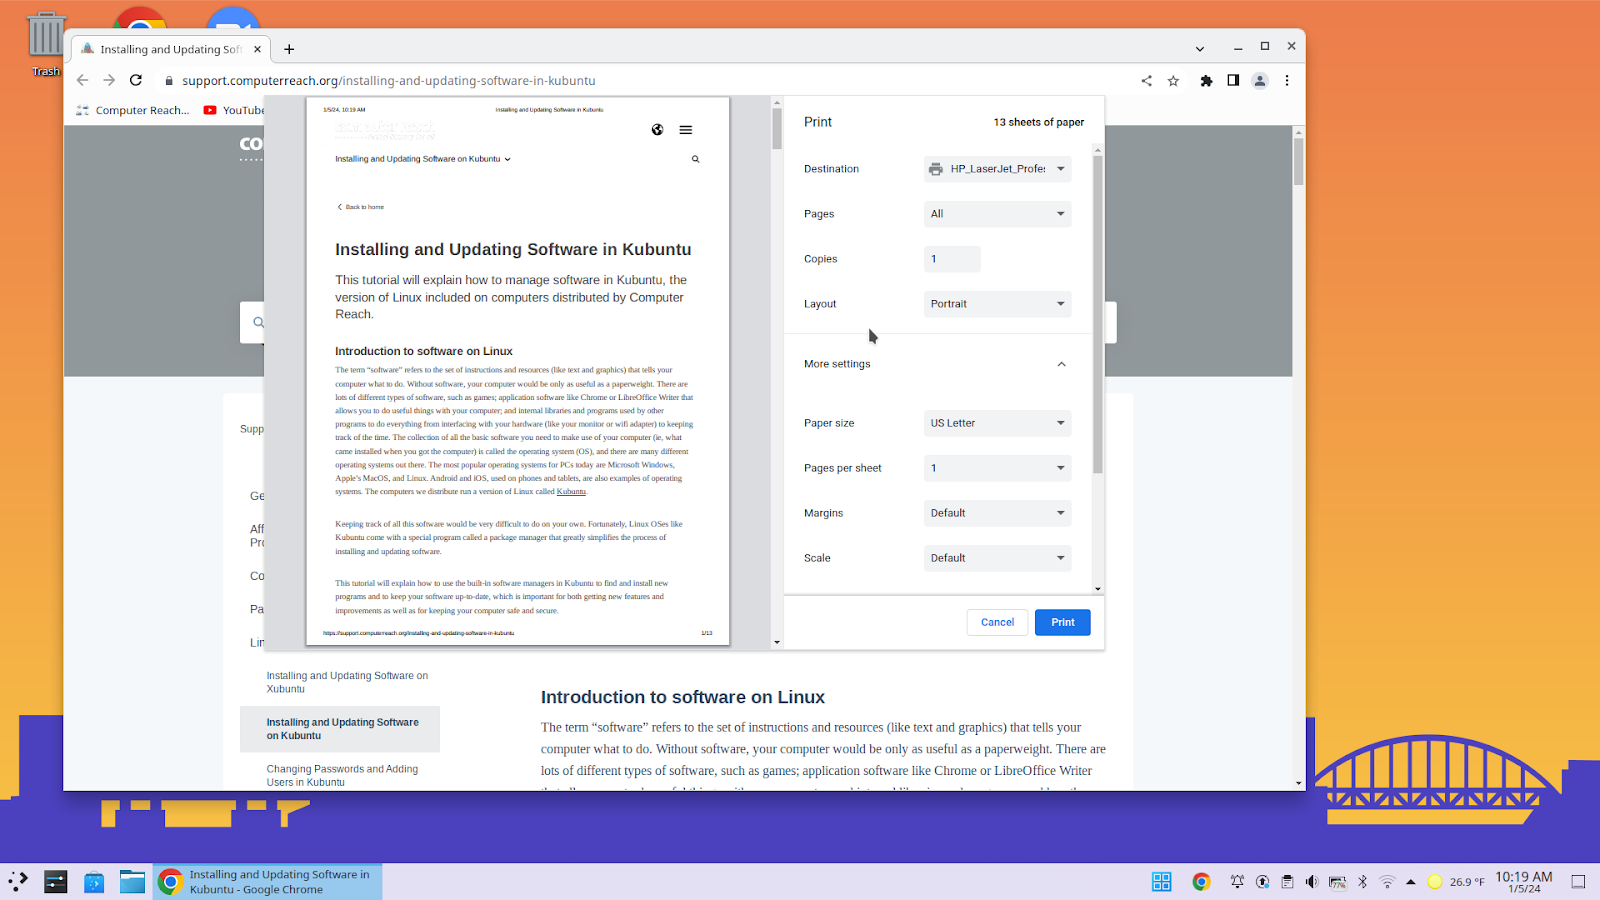
These options suffice for most printing needs. However, there are additional settings located under the section labeled “More settings”. This is where you can make adjustments to things like the margin size of the document, the scale (should it be bigger or smaller than what is naturally represented on the screen?), etc. The most useful option here for most day-to-day uses is the option to print the document double-sided (“Two-sided”). If your printer supports it (also called “duplex printing”), then sending the document to the printer with that option selected will result in the document being printed on both sides of the paper. By default, it will only print on one side of the paper.
The process is very similar in a word processor or PDF reader. The main differences lie in the fact that most word processors and many PDF readers have a dedicated printing button on their main screens in addition to in the menus.
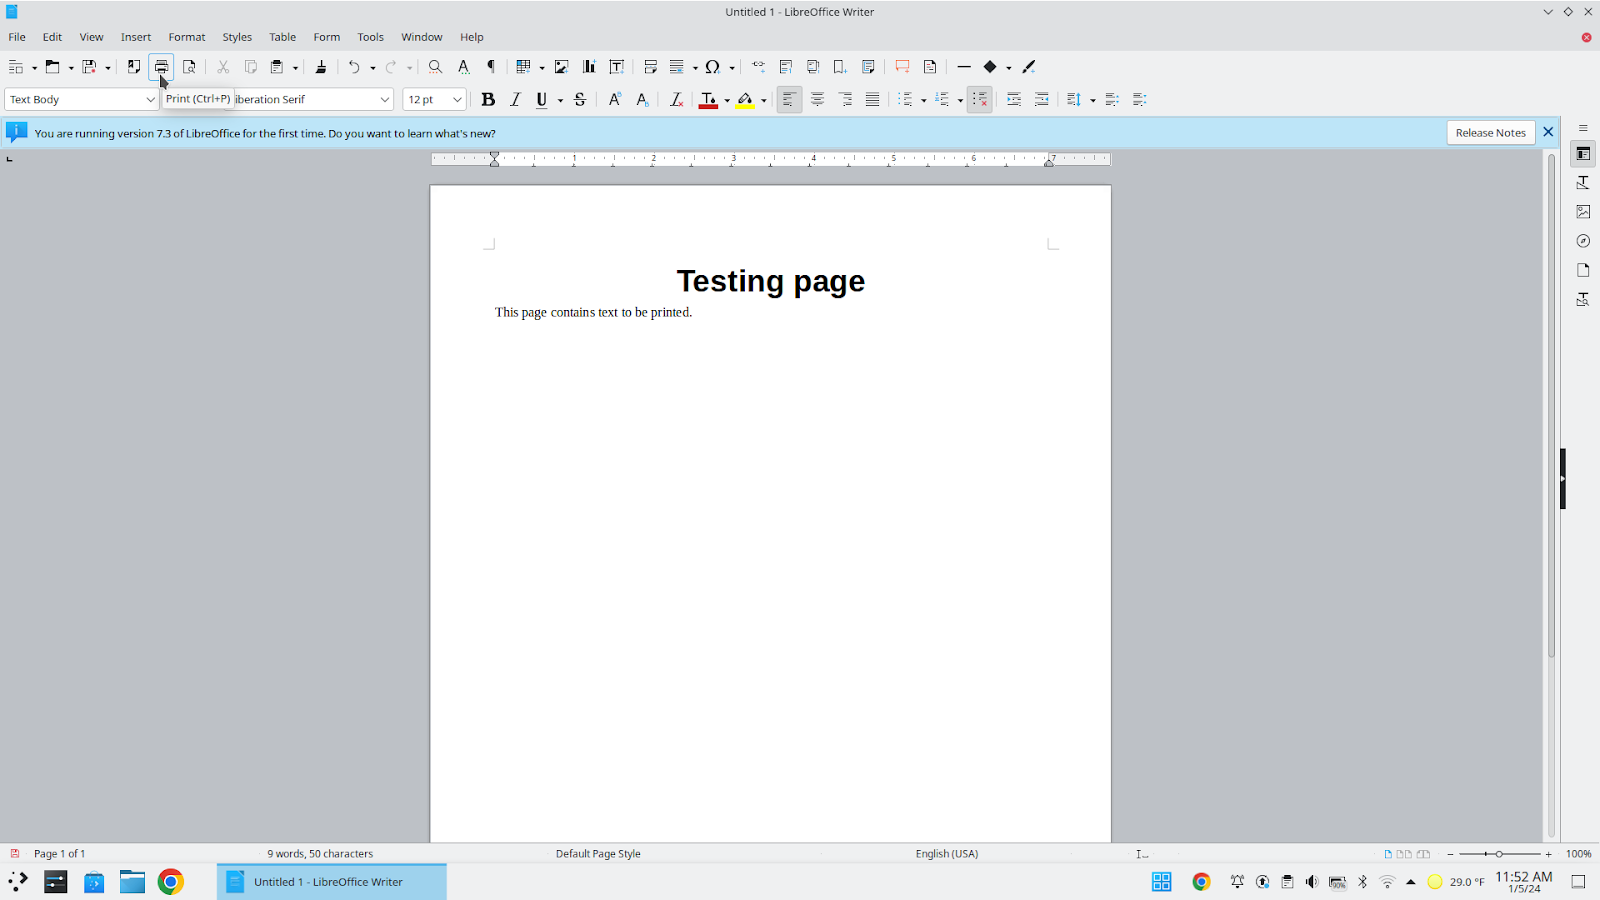
Clicking on that button will open a printing dialog very similar to what we saw before in Chrome.
Solving common problems: Clearing the print queue
If your document won’t print, there are three common issues that might be causing it, with a solution to each one. The first thing to do is double-check that the printer is on and connected to your computer, either through USB or wifi. Second, you should double-check that the printer itself is mechanically functional (ie, it’s not physically broken) and that it is properly-supplied with ink or toner. (Unlike many other technologies associated with computers, printers have a lot of moving parts, meaning there are a lot of opportunities for things to go wrong mechanically.)
If everything is physically correct between your computer and printer, then the last common solution to printing issues is to clear the print queue. The print queue is a list of documents that are set to be sent to your printer. Because it is very common to try printing multiple times when something doesn’t print correctly the first time, it means that it is fairly common for multiple documents (or the same document multiple times) to be sent to the printer at once. While they should normally be able to handle that (so you can print multiple documents back-to-back), it does sometimes happen that the printer will get stuck on one of them, jamming up the entire queue. The easiest thing to do in this case is to clear the print queue and start over.
You can find the queue in the printer settings where we first configured the printer. You will notice that the last button on the right side says “Open Print Queue”. Click on it and you should see something like this:
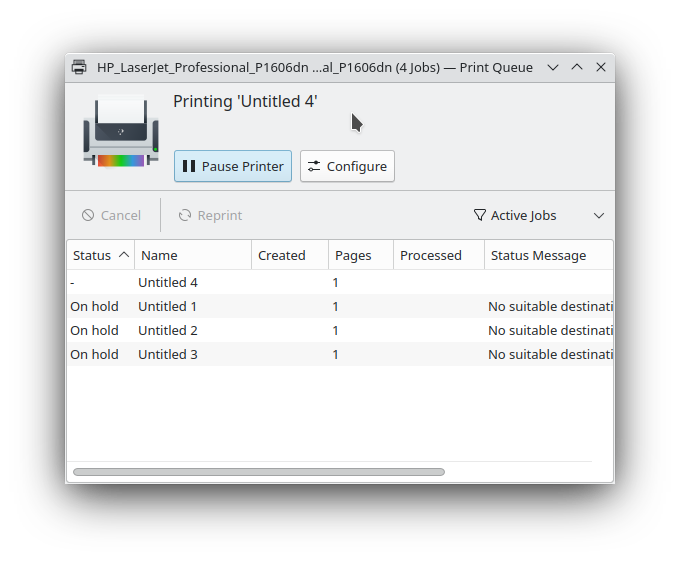
You can see that each print job has a status “On hold”. To clear the queue, you need to click on each job on the bottom and then click “Cancel” above the list of jobs. This will cancel one job at a time. From there, you can try again or try to diagnose the problem further.
Conclusion
Printing is an analog technology in a digital world. It is a technology that bridges the clean and abstract world of the computer, a world of bits and algorithms, with the messy and concrete world of ink, paper, and metal. Consequently, it is by its nature finicky and complicated. Failed print jobs and unresponsive printers are unfortunately unavoidable, but they are usually problems that have solutions. If you can’t avoid printing something, then an understanding of common interface designs and some trial and error are indispensable tools.